
You guys, I’m so proud of myself! I’ve only gone and baked myself some bread! Now, you might think “well, duh, you’re a baker, right?”, but any baker will be able to tell you that baking bread is something completely different from baking pies and tarts and cakes. And I’d only ever baked something resembling bread once before a couple of years ago. I think it was a pizza type dough.
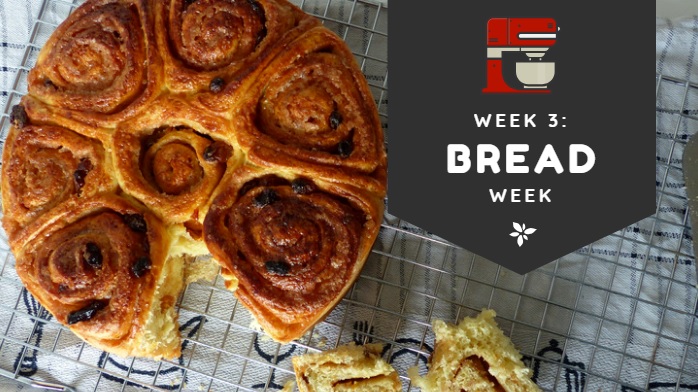
Anyway, back to this bread! It was Bread Week on The Great British Bake Off – the week everybody always dreads, including me this year. I was going to have to bake along and I knew nothing about bread! Luckily, the Signature Challenge of the episode was to make Chelsea Buns (for the Americans: think cinnamon rolls). Baking something like Chelsea Buns or cinnamon rolls had been on my baking bucket list for a while now, so it was perfect. Still daunting, but perfect!
I found a recipe from the winner of the 2015 edition of Heel Holland Bakt (the Dutch Bake Off). She bakes something that looks like Chelsea buns, only she calls it suikerbrood (“sugar bread”, a typical Dutch bread). They seemed close enough to Chelsea buns to me, though, so I decided to give them a go. I used her quantities for the bread, but changed the method a tiny bit (I used a stand mixer, for instance) and also changed up the filling. I added sultanas, for example, which are a must in Chelsea buns, or so I’ve been told by Bake Off and Wikipedia. I also added a little more orange zest.
I was so afraid the dough wouldn’t rise properly, or that I would do something wrong with the baking, but these buns came out perfectly! The original recipe was a bit brief in its directions, so I’ve written it all down a little more elaborately (and in English) so it’ll be easier to follow.

You’ll need… (for 8 buns)
For the bread
- 150 ml milk
- 7 g dried/instant yeast
- 2 teaspoons caster sugar
- 350 g plain flour
- 1 egg
- 75 g butter, softened
- 1 teaspoon vanilla extract
- pinch of salt
For the filling
- 20 g softened/melted butter (for brushing)
- 50 g cane sugar
- 100 g granulated sugar
- 1 teaspoon ground cinnamon
- zest of 1 orange
- 75 g sultanas
The rest
- 1 egg (for brushing)
- springform tin (18 or 20 cm)
- food thermometer
- cling film
- rolling pin (or empty wine bottle – also does the trick)
- stand mixer (if you don’t feel like kneading by hand – like me)
- and an oven, of course! For this bread, you’ll need to preheat your oven at 220 °C (but it’ll be baked at 200 °C – read the recipe closely!)
So, let’s get baking!
 1. Heat milk and dissolve yeast and sugar Pour the milk into a saucepan and heat it on the stove until it’s around 37 °C (this is where the thermometer comes in). Take the saucepan off the stove, but pay attention to your thermometer: chances are the temperature is still rising and it’ll get above 40 °C even when it’s off the heat. If this is the case, you wait until it’s gotten to 37 °C (or a little lower) again. Then, add the dried yeast and the two teaspoons of sugar and stir until they’re more or less dissolved.
 2. Mix flour, milk mixture, egg, butter, and vanilla Put the flour into the bowl of your stand mixer and then add the milk mixture, the egg, the softened butter, and the vanilla extract. Using the dough hook, mix it all together until just combined. If you’re not using a stand mixer, use a wooden spoon or your hands.
3. Add salt and mix/knead Now, you add the pinch of salt. You only add it at this point because salt and yeast usually don’t play nice together, so it’s safer to add the salt a little later. Now, put the mixer on a low speed (I changed between “min” (slowest speed) and speed 1 (a tiny bit faster)) and let it mix for 8 to 10 minutes. Not using a stand mixer? Knead with your hands for 10 minutes until you’ve got an elastic dough.

4. Let the dough rise Once your dough has been kneaded enough, put it into a large, clean bowl. Cover the bowl with cling film (make sure it’s airtight! I put a tea towel over the cling film just to make sure) and then let the dough rise for 30 to 45 minutes. If at all possible, put it in a warm spot, like next to the radiator or in the sun behind the window. The dough should double in size.
5. Prepare the filling In a small bowl, mix together the cane sugar, granulated sugar, cinnamon, and orange zest.
6. Roll out dough and cover with butter Once your dough is done with its first rise, transfer it to a floured surface and roll it out into a large rectangle. Brush the softened or melted butter onto the rectangle once you’re done rolling it.
 7. Add filling and sultanas Sprinkle the sugar/cinnamon/orange mixture onto the rectangle of dough and make sure it’s divided evenly. Next, sprinkle over the sultanas as well and divide these evenly as well.
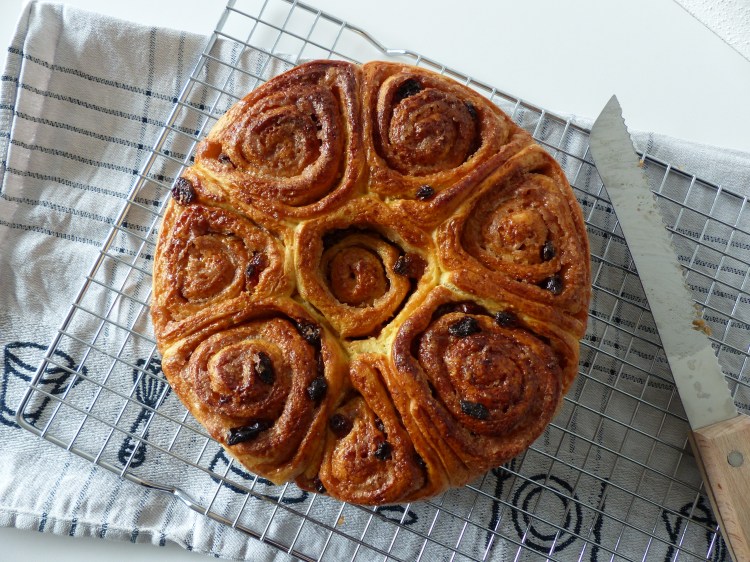
8. Roll up the dough Take the edge of the dough that’s closest to you and then roll it up as tightly as you can, making sure the filling stays in place. Once it’s all rolled up, trim off the edges and then neatly cut the roll into 8 equal pieces. Carefully place the dough rolls upright into a greased springform tin.
9. Let the dough rise again The dough will now need a final rise. Cover the springform tin with cling film (and optionally a tea towel if the film isn’t sticking properly) and place the tin in a warm spot. Leave the dough to rise for another 30 to 40 minutes. Preheat your oven to 220 °C during this time.
Before and after the rise:


10. Brush with egg Remember that last egg, for brushing? Beat it with a fork in a small bowl or a glass. When the dough is done rising, lightly brush the buns with the egg. Don’t use all of it! You’ll only need a little bit of the egg to brush the dough with.
11. Bake! Your oven will be preheated to 220 °C now. Turn it down to 200 °C and then bake the bread at the bottom of the oven for 25 to 30 minutes. Once the bread is done baking, take the tin out of the oven and let it cool on a cooling rack. Carefully remove the springform tin from the bread after about 15 minutes and then let it cool completely.
And that’s it! You’ve got your own Chelsea Buns with a Dutch twist! Enjoy!


The pictures of these are so enticing I can just about breathe in the aroma of freshly baked Chelsea buns. 🙂
Ah, thank you so much Marje! There’s only one bun left now – they were SO delicious. I’m definitely going to make this more often 🙂
Reblogged this on M J Mallon Author and commented:
A fabulous recipe for Chelsea buns via Anne at books baking and blogging.
These look fantastic – well done! 🙂
These came out so well. Congratulations.