
It’s almost Christmas! Are you as excited as I am? I love Christmas, and all the good food and company and cosiness that comes with it. I think it’s my favourite time of the year (although I’ve said that before…). I figured I should come up with a nice Christmassy recipe before the day actually arrives, so yesterday I thought of these coconut and chocolate Christmas cookies, which you can use as decoration for your Christmas tree as well!
I’m quite proud of these cookies, since I’m not that much of a cookie expert, and precision isn’t my strong suit when it comes to baking and decoration. For a while it seemed as if they weren’t going to work out very well, as the dough was a bit too dry, but that was easily fixed! The coconut flavour comes through very subtly, and the chocolate complements it nicely.
What with it being winter and all, the sun started setting before 4pm today, so it was already pretty much dark out when I had to take pictures of the final result. Even though I love Christmas, I do hate that early sunset… The pictures turned out pretty okay, though, I think, so it’s all good!
Hopefully you’ll like these delicious cookies just as much as I do, and before I forget: Merry Christmas, everyone!
You’ll need… (for 12-16 cookies)
– 100 g plain flour
– 75 g butter (at room temperature)
– 50 g white caster sugar
– 1 egg yolk
– 50 g shredded coconut (and a bit extra for decoration)
– dark chocolate, melted (about 100 g)
– (star-shaped) cookie cutter
– apple corer (or the cap of a tiny bottle)
– parchment paper
– baking tray
– optional: some ribbon
– and an oven, of course! These cookies need to be baked at 180 °C (don’t forget to preheat your oven!)
So, let’s get baking!
1. Mix butter and flour Take a bowl and mix together the butter and the flour with a (wooden) spoon. It doesn’t have to be completely mixed, since you’re going to knead it in a bit, so don’t worry about any (pretty much inevitable) lumps.
2. Add sugar, coconut and egg yolk Add the caster sugar, the shredded coconut and the egg yolk to the bowl, and slightly mix them through before you start kneading the mixture into a nice dough. Knead everything together with your hands until it’s evenly combined, and start forming it into a ball. If it’s a bit too dry and crumbly, try adding a tiny bit of water. Be careful with this, though, because you don’t want your dough to be too soft.
3. Chill dough for 10 minutes Cover the ball of dough in cling film and put it in the refrigerator to chill for about ten minutes. In the meantime, you can prepare for the next step. Lightly dust your (clean!) work surface with flour, and get out your cookie cutter(s). I used a star-shaped one, because of the whole Christmas theme, but you could of course use any shape you want. Also get out your rolling pin and your apple corer (or the cap of a tiny bottle — that’s what I used, for lack of a better tool). You’ll need this to make a hole in the middle of your cookie for the ribbon to go through. You should also get your baking tray ready by lining it with parchment paper.
4. Roll out dough and cut cookies When your dough has chilled sufficiently, take it out of the fridge and roll it out on your floured work surface (also make sure you lightly flour the rolling pin). The rolled out dough should be about half a centimeter thick. Cut your cookies, create a hole in the middle with the corer/cap, and transfer them to your baking tray. Don’t forget to leave enough room between the cookies on the tray. Of course, you don’t have to make holes in your cookies — I decided to leave a few of them without holes as well.
5. Bake the cookies Now, it’s time to put your cookies in the oven! They need bake for about 15 minutes, or until they’ve turned (golden) brown. When they’re done, take them out and leave them to cool for a while. They need to be completely cooled before you can get to work with the chocolate. I was impatient, so I put them in the refridgerator for a couple of minutes, which is fine as well.
6. Do stuff with the chocolate Melt your dark chocolate in a glass or a dessert bowl. Once your cookies have cooled down entirely, dip them into the chocolate until half of the cookie is covered. Let the excess chocolate drip back into the bowl, and then place the cookie back on the baking tray (still covered in parchment paper). Repeat the process for all of the cookies, and sprinkle the extra shredded coconut on top for decoration. The chocolate will have to set, so put your baking tray with all of the cookies back in the refrigerator for a while.
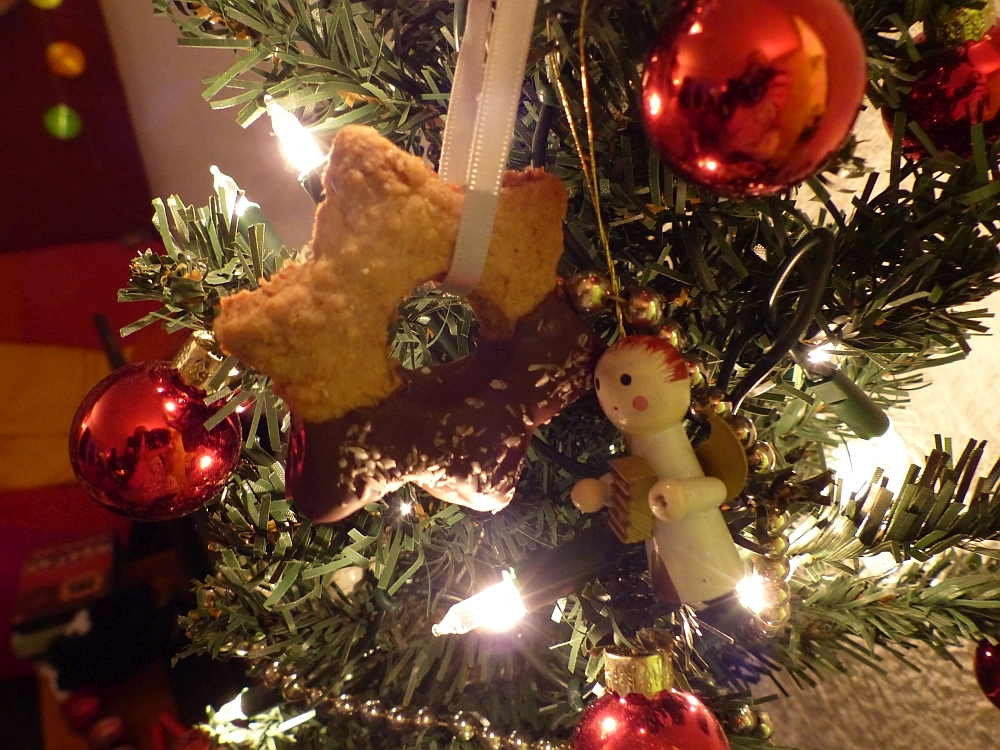
If you want to make them into Christmas decorations, put a piece of ribbon through the holes in the cookies, and hang them up in your tree. I wouldn’t leave them there for too long, though, because the chocolate might melt (these cookies are best stored in the refrigerator).
And there you have it! Your delicious coconut and chocolate Christmas cookies are done! Enjoy!
Merry Christmas!


Thankss for this blog post