
Those of you who follow me on Instagram might remember that I bought these adorable little pastry tins a few weeks ago. I’ve been wanting to use them ever since, and last night while I was lying in bed I came up with the idea for a perfect recipe to use them for. Tiny tarts with all sorts of yummy berries! Oh, and pastry cream, because who doesn’t love pastry cream?
I’m pretty darn proud of myself for making these, to be honest. They look absolutely adorable, and they taste even better (if that’s possible). These tartlets are great as a dessert when you’re having friends over for dinner you want to impress. If you don’t want to share them with your friends or family — not to worry! They’re also great with a nice cup of tea. Or as a late lunch, which I may or may not have used one of them for.
The recipe has quite a lot of steps (in comparison to most of my other recipes), but don’t let that scare you away! These are actually quite easy to make, they just take a little bit of time. You can use both fresh or frozen fruit. I still had a bunch of frozen fruit in my freezer, so I just used that. Still delicious! I just can’t stop staring at these pictures, to be honest, which is pretty stupid, because I’ve got the real thing here to be looking at as well. They just look so good!
There’ll be quite a bit of dough leftover probably, but I didn’t want to mess around with “half an egg yolk” kind of measurements, because that’s just annoying. You could use the leftover dough for another little tart, but keep in mind that you most likely won’t have any pastry cream leftover.
I hope these tiny tarts will make you as happy as they made me if you decide to make them!

You’ll need… (for 6 tarts)
For the pastry
- 130 g plain flour
- 65 g butter
- 45 g white caster sugar
- 1 egg, beaten
- a pinch of salt
- clingfilm
- a large glass or a cutter (9-10 cm)
- parchment paper
- baking beans
- 6 tiny tart tins (8 cm)
- rolling pin (although a wine bottle works just fine as well)
- and an oven, of course! This pastry needs to be baked at 180 °C (don’t forget to preheat your oven!)
For the pastry cream
- 3 egg yolks
- 25 g plain flour
- 250 ml whole milk
- 1 teaspoon vanilla flavouring
- 55 g sugar
For the topping
- 150 g assorted berries (strawberries, blackberries, raspberries, blueberries etc. — either frozen or fresh)
- 3 tablespoons strawberry jam
So, let’s get baking!
Preparing the dough
1. Mix butter, flour and salt together Put the butte the flour and the pinch of salt in a large bowl, and rub them together with your (preferably cold) hands. Keep doing this until the mixture looks like breadcrumbs.
2. Add sugar and egg Add the sugar and the beaten egg to the mixture, and gently stir it through with a spoon. Now you have to knead the mixture into a ball of dough (but don’t overwork it). The dough will be quite soft, but don’t worry, that’s fine! Wrap the ball of dough in clingfilm, and put it in the fridge. Cool it for one hour.
Making the pastry cream
3. Mix egg yolks and flour Take a (heat resistant) bowl and mix the egg yolks and the flour together with a whisk until it’s nice and smooth.
4. Cook milk and vanilla Take a sauce pan and cook the milk together with the vanilla over medium heat until starts to simmer.
5. Add milk to egg mixture Once the milk has started to simmer, you need to gradually add it to the egg mixture. It is very important that you keep stirring the egg mixture in the meantime, otherwise you’ll get lumps in your mixture.
6. Cook the mixture After everything’s well-combined you need to pour the mixture back into the saucepan and put it over medium heat again until it’s simmering. Keep stirring the mixture the entire time. Once it’s simmering, let it simmer for about 2 minutes before moving on to the next step.
7. Add sugar to mixture Add the sugar to the mixture and stir until it’s entirely mixed through.
8. Pour mixture in bowl and cover with clingfilm Once your pastry cream is done, pour it into a bowl and cover the bowl with clingfilm (this way the pastry cream won’t develop that nasty little layer on top of it). Leave the pastry cream to cool for a few minutes (with the clingfilm on top already!) and then put the bowl into the fridge to let it cool completely.
Back to the dough!
 9. Roll out dough After you’ve let the dough chill for one hour, take it out of the fridge again. Lightly dust a (clean!) surface with flour, and roll out the dough until it’s about 2 mm thick.
10. Cut six circles and transfer to tins Once you’ve rolled out the dough, cut six circles out of it and transfer each circle to a greased and floured tin. Gently press down the dough into the tins.
11. Add flour and baking beans To make sure the baking paper doesn’t stick to your pastry while baking, divide a tiny bit of flour over the bases of your tins (on top of the pastry). Then, line the tins with squares of parchment paper (so, again, on top of the pastry), and fill the tins with baking beans.
 12. Bake the pastry! Put the tins in your preheated oven (180 °C) and bake the pastries for 15-20 minutes. Then, take out the baking paper and baking beans and bake the pastry for another 2-5 minutes (until the bottom of the pastry just starts to brown slightly here and there). Take the pastries out of the oven and let them cool in their tins for 5-10 minutes. Then take them out of the tins to let them cool completely.
The filling
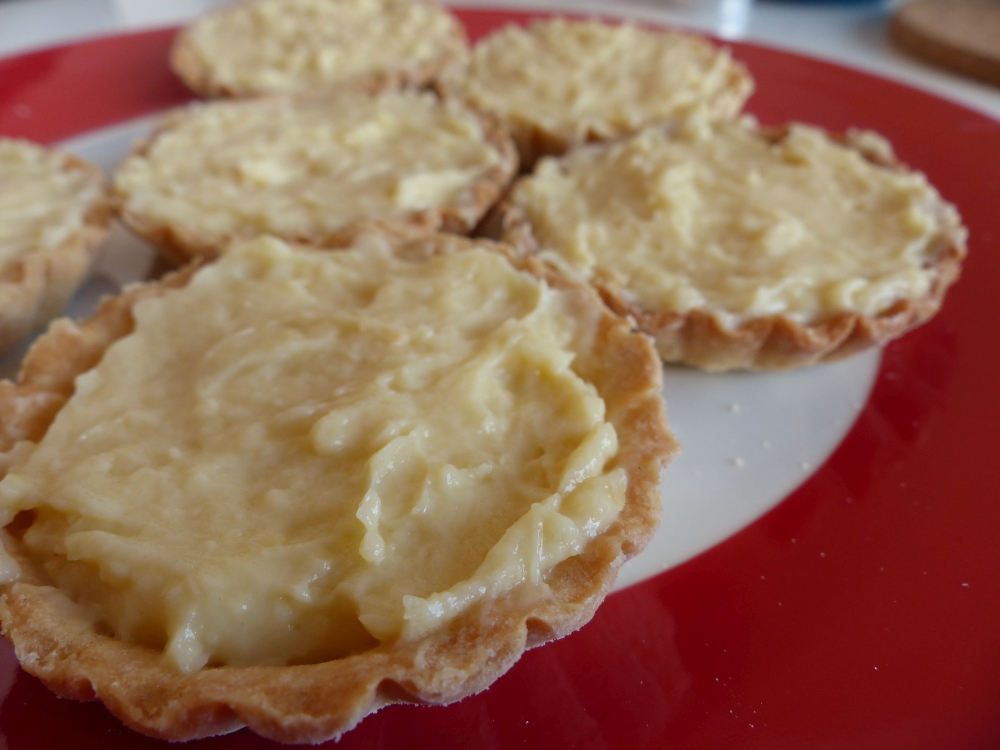 13. Divide pastry cream over pastries Once the pastries have cooled down completely, divide the pastry cream over the pastries. My cream became quite thick in the fridge, so I just used a spoon to divide it.
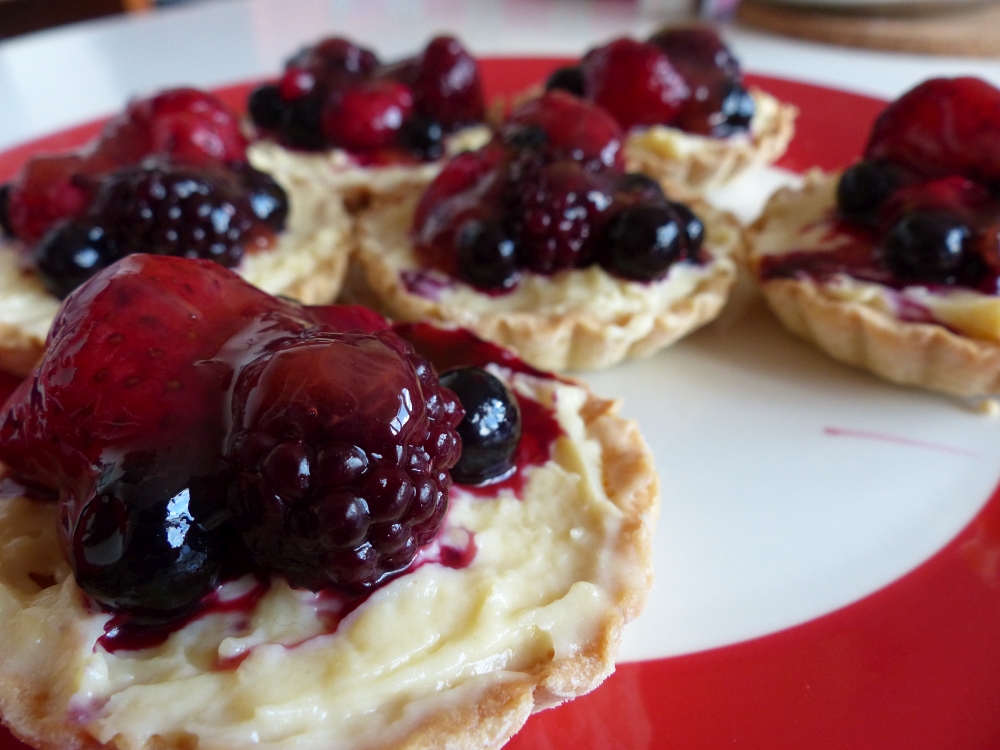
14. Add the fruit Place your fruit on top of the cream any way you like. I went for one of each of the large berries (strawberry, blackberry and raspberry) and some blueberries sprinkled around them.
15. Glaze fruit with melted jam Put the strawberry jam in a small saucepan and heat it for just a couple of minutes on the stove until it has become quite runny. Then, dribble it on top of your fruit for that extra bit of sweetness.
And there you have it! Your adorable, tiny forest fruit tarts! Enjoy!


They look yummy!
Thank you! They really are. 😀
This look absolutely gorgeous! Yum, yum. I’ve just managed to perfect shortcrust pastry so I must give these a try. I also must follow you on Instagram!
Thank you, Cathy! I was pretty pleased with myself, haha. Oh, do let me know how they turn out 🙂 And I look forward to following you Instagram shenanigans! 🙂
Fantastic tutorial! Thank you for sharing! I must try this. 🙂
Thank you very much! I hope it’ll be helpful to you. 🙂