
As I mentioned in my Monthly Recap, I celebrated my 22nd birthday this past week, which is more or less the reason why I haven’t posted anything since said recap… That, and the two deadlines I had this week. Those didn’t help either.
Anyway, I’m here now, which is what’s most important! My birthday was a lot of fun, with lovely presents (the complete series of Gilmore Girls being the highlight!) and even lovelier people to celebrate it with. On the 7th of October itself I had dinner at my parents’ together with my grandparents, my aunt and my cousin, and the day after I cooked dinner at my own place for four of my best friends. We ate, we drank, we played Cards Against Humanity – it was great!
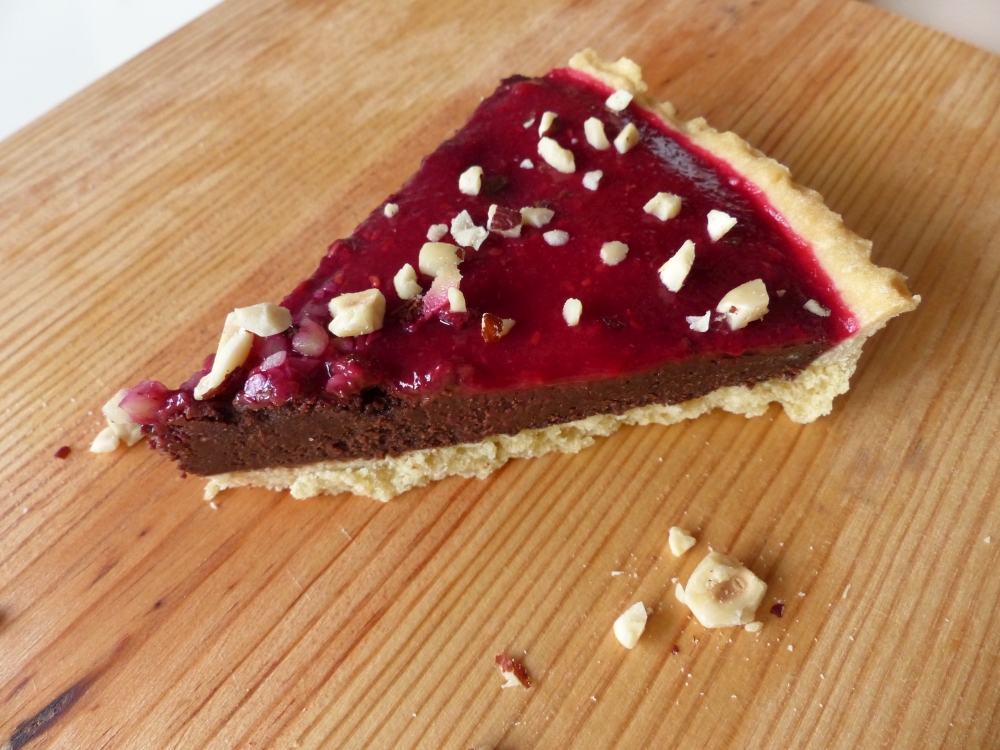
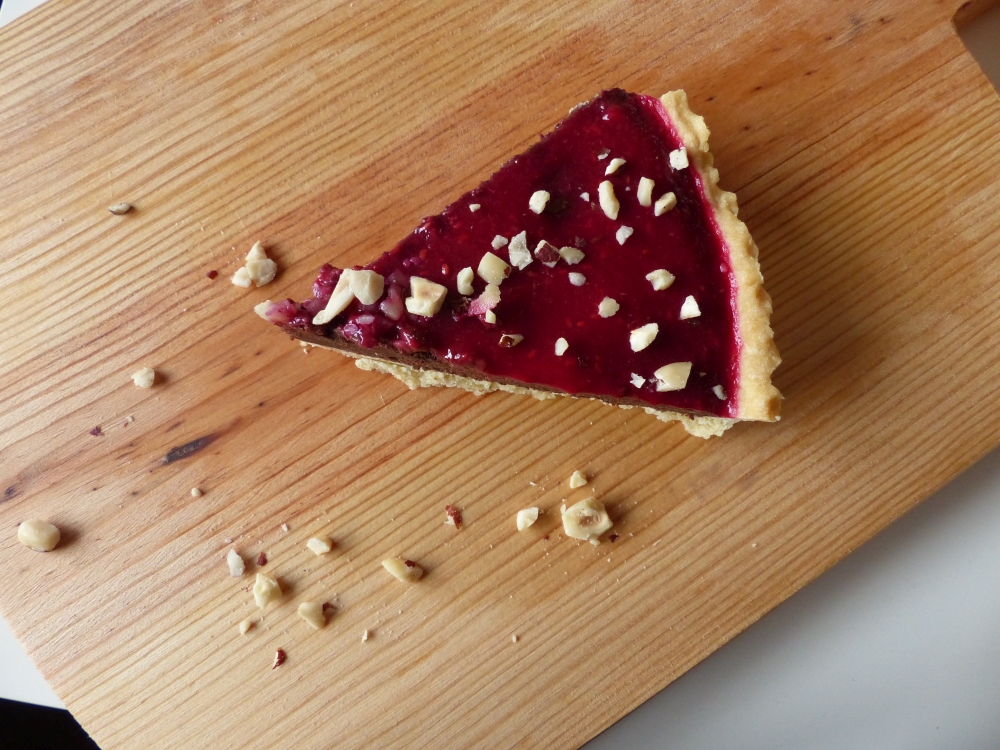
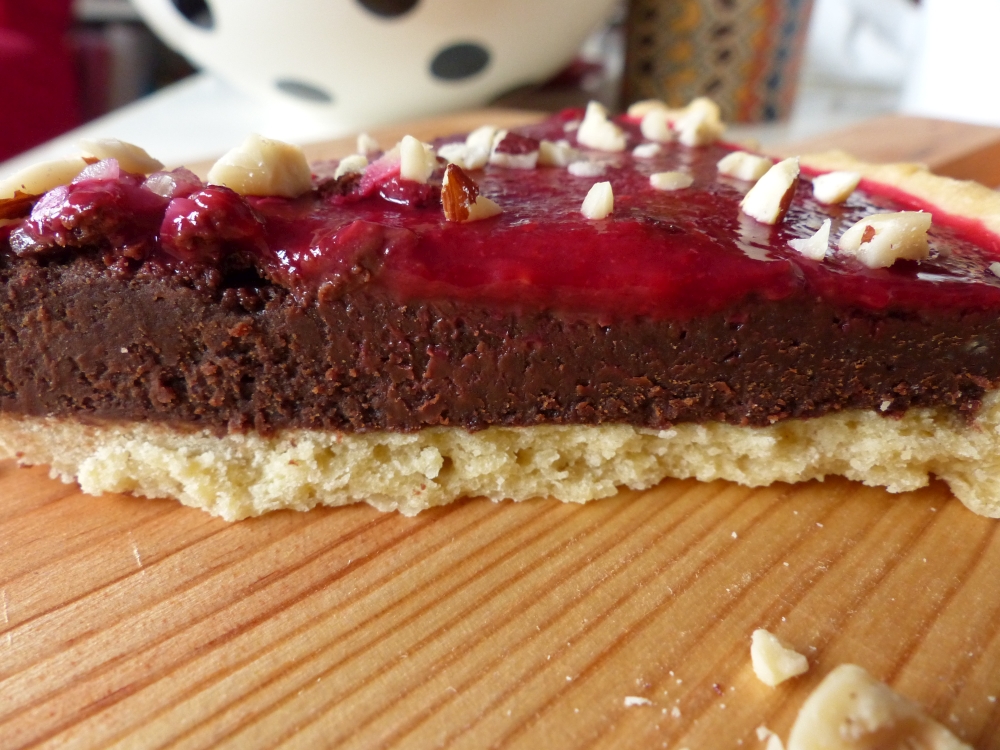
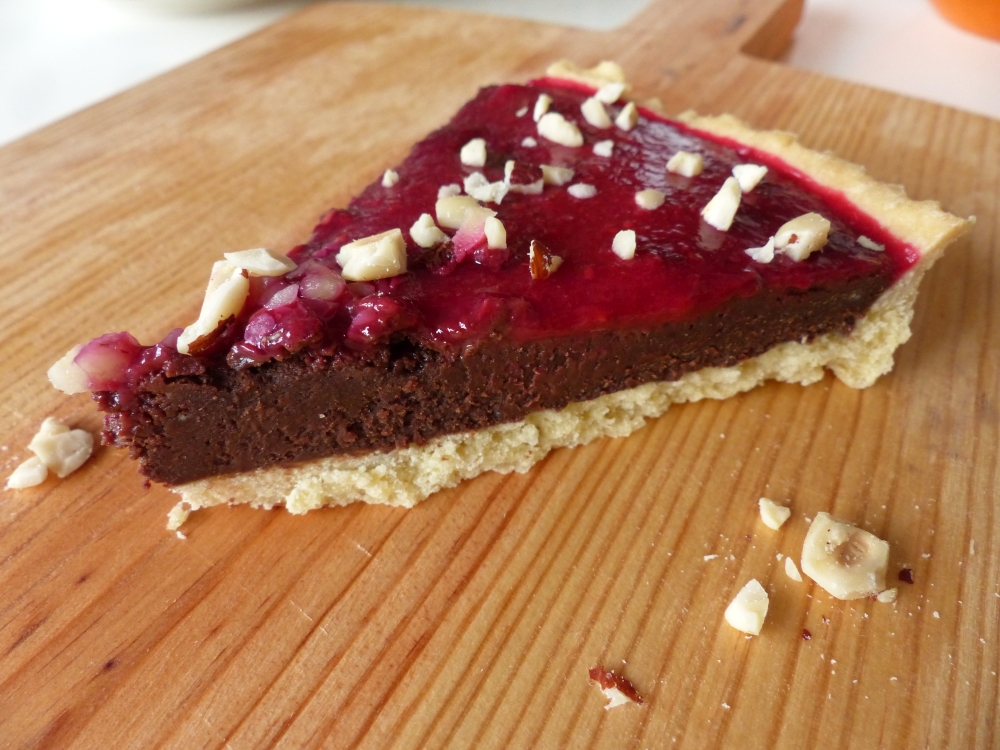
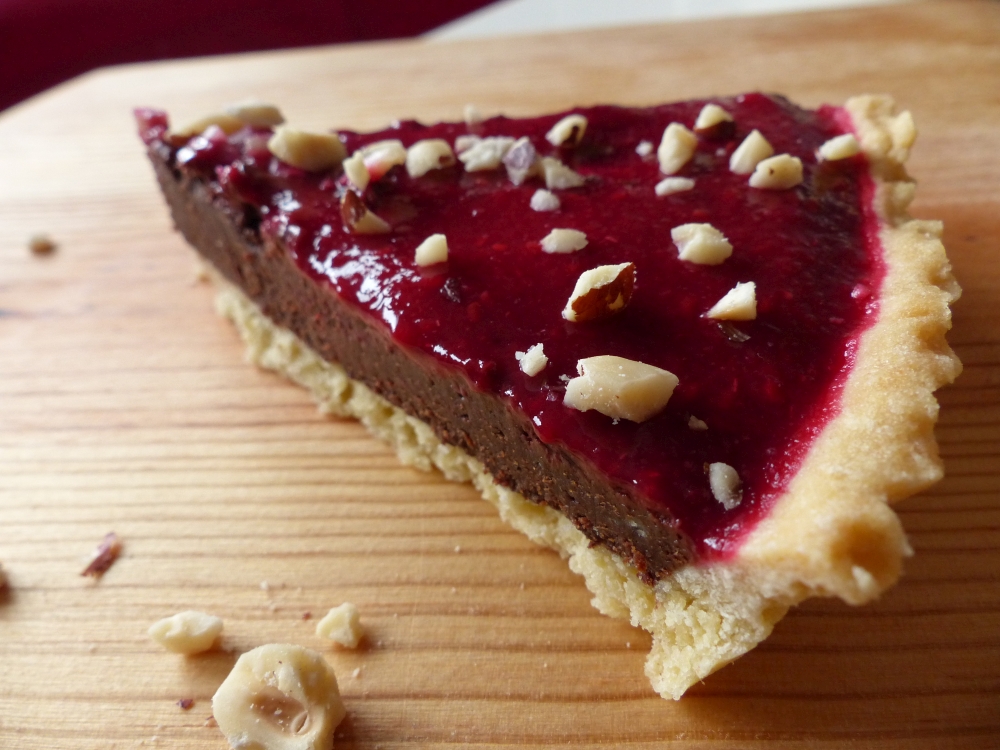
That dinner leads me to today’s recipe… I made a chocolate brownie and raspberry tart as the dessert for the dinner with my friends, and it was a huge success! It was absolutely delicious, with the raspberry coulis providing a fresh, tangy flavour to accompany the fudgy, chocolate-y brownie.
This tart was inspired by Tamal’s creation in The Great British Bake-Off during chocolate week, when he made a chocolate tart with raspberry coulis as well. Most recipes for chocolate tarts use a lot of cream or milk, though, and I couldn’t do that for this one, because one of my friends is allergic to milk. So I came up with the brownie idea and it worked splendidly!
I also added some chopped hazelnuts on top, since my parents had a lot of hazelnuts lying around (there’s a hazel tree in the garden) and hazelnuts are great, so why not? I roasted them in the oven and blitzed them up in my tiny food processor. They’re a great addition to this already amazing tart.
One last thing: I took the pictures the next day (when it wasn’t dark outside and I had natural lighting) so that’s why there’s only one piece in the pictures – most of the tart was gone already!
You’ll need…
For the pastry
- 260 g plain flour (and a little bit extra for dusting purposes)
- 125 g butter (cold, in cubes)
- 90 g white caster sugar
- 2 medium sized eggs, beaten
- a pinch of salt
For the brownie filling
- 120 g unsalted butter (melted)
- 160 g sugar
- 3 medium-sized eggs
- 50 g plain flour
- a pinch of salt
- 200 g dark chocolate (at least 70% cocoa)
For the raspberry coulis
- 250 g raspberries
- 1 tablespoon icing sugar
Optional
- Chopped hazelnuts
Additionally…
- food processor/blender type thing
- sieve
- clingfilm
- parchment paper
- baking beans
- flan tin (24 cm or larger)
- rolling pin (although a wine bottle works just fine as well)
- and an oven, of course! The pastry needs to be baked at 180 °C (don’t forget to preheat your oven!)
So, let’s get baking!
The Pastry
1. Mix butter and flour together Put the butter and the flour in a large bowl, and rub them together with your (preferably cold) hands. Keep doing this until the mixture looks like breadcrumbs.
2. Add sugar and eggs Add the sugar and the beaten eggs to the mixture, and gently stir it through. Now you have to knead the mixture into a ball of dough (but don’t overwork it). The dough will be quite soft, but don’t worry, that’s fine! Wrap the ball of dough in clingfilm, and put it in the fridge. Cool it for one hour.
3. Roll out dough After you’ve let the dough chill for one hour, take it out of the fridge again. Lightly dust a (clean!) surface with flour, and roll out the dough until it’s about 3 mm thick. Make sure it has a round shape so it completely covers the tin.
4. Transfer dough to tin Now it’s time to transfer your dough to a greased and floured flan tin. Let’s hope it doesn’t stick to your work surface! To easily transfer the dough, carefully roll it around your (floured!) rolling pin, lift it, and then roll it out again over the tin. Be very careful while you do this, since the dough might stick to your surface, and you don’t want it to rip. Once you’ve succesfully rolled out the dough over the tin, press into the edges (gently), and trim off any excess dough around the edges. Prick with a fork into the bottom a few times.
5. Add flour and baking beans To make sure the baking paper doesn’t stick to your pastry while baking, divide some flour over the base of your tin (on top of the pastry). Then, line the tin with parchment paper (so, again, on top of the pastry), and fill it with baking beans. Put the whole thing in the fridge for another 15 minutes (at least).
6. Bake the pastry! After another 15 minutes of letting the pastry chill, put the tin in your preheated oven (180 °C) and bake it for 10 minutes. Then, take out the baking paper and baking beans and bake the pastry for another 5-7 minutes (until the bottom of the pastry just starts to brown slightly here and there).
The Brownie Filling (prepare this while the pastry is baking)
7. Melt the chocolate You can melt the chocolate in the microwave or by using the bain marie method on the stove. Either way, melt it.
8. Mix together butter and sugar Take a clean bowl and mix together the sugar and the melted butter with a whisk until it’s evenly combined. No need for it to be pale and creamy or anything.
9. Add the eggs Crack the three eggs into the mixture one by one and whisk them through the batter until they’re nicely incorporated.
10. Add flour and salt Add the flour and the pinch of salt to the mixture and, once again, whisk it through.
11. Add melted chocolate Only one thing left to add now, and the most important bit: the chocolate! Whisk it through the mixture until it’s all combined.
12. Pour brownie batter into pastry case Once your pastry is done baking, take it out of the oven, and pour in the brownie mixture (you might have a little too much – although there’s no such thing as too much brownie mixture). Remember that it will rise a teeny tiny bit, so don’t fill it all the way to the edge.
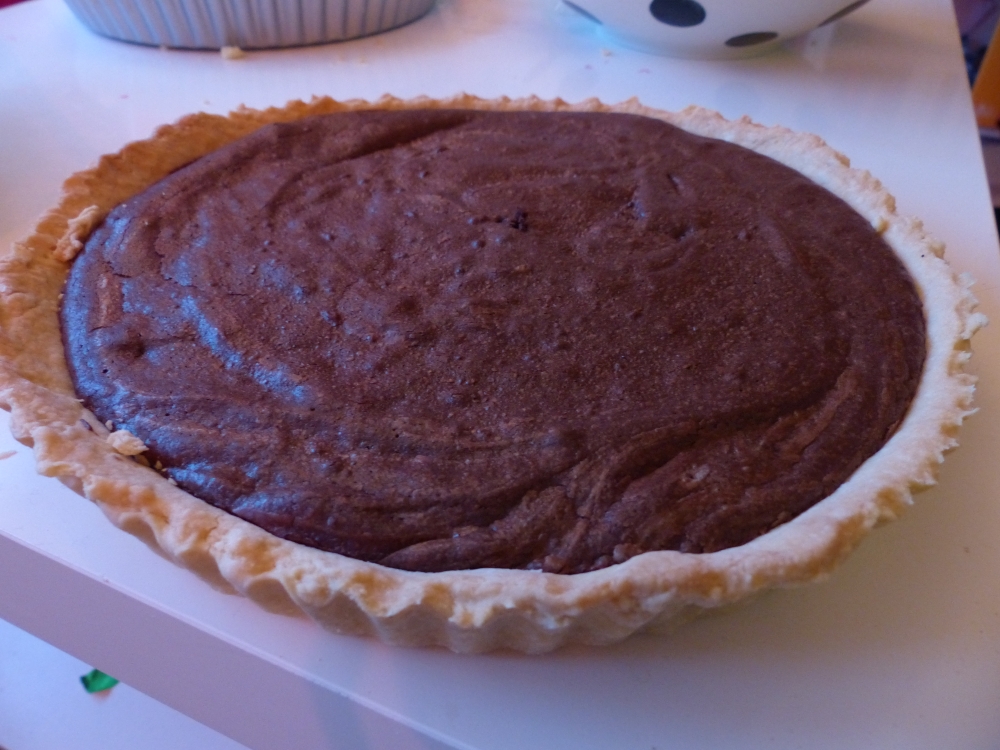 13. Bake! Lower the oven temperature to 160 °C and put the tart back in. Bake it for 20 to 25 minutes, or until a skewer comes out relatively clean. The brownie mixture shouldn’t be dry, but it also shouldn’t be very wet anymore. If you think it’s done, take it out of the oven and let it cool.
The Raspberry Coulis (I recommend preparing this as the dough is resting and putting it in the fridge until you need it)
14. Heat raspberries and sugar Place the raspberries and the icing sugar in a (frying) pan together and heat it until the raspberries start to break down.
15. Process the raspberries Transfer the raspberries to your food processor and process it until they’re all smooth.
16. Strain raspberry mush through sieve Place your sieve above a small bowl and strain the raspberry mush through the sieve with a spoon to get rid of all the seeds.
17. Pour coulis over tart (and add hazelnuts) Once your brownie tart has cooled down (and the coulis as well), pour the coulis over the tart. If you decided to use them, sprinkle the chopped hazelnuts over the top of the tart as well at this point.
And there you have it! Your own delicious chocolate brownie tart with raspberry coulis! Enjoy!

This is brilliant! When Tamal made his chocolate torte with raspberry I thought it was great because, as you say, the fruit would give such a nice contrasting flavour and stop the chocolate being too sickly. Great idea! 🙂
Thanks, Claire! 😀 Exactly, that’s what I thought as well! This tart was absolutely delicious. 🙂
That tart looks delicious! And you can’t go wrong with Gilmore Girls 🙂
Thank you, Sarah, it really was! And that’s definitely true. 😉
This tart looks so delicious! Although I don’t think I actually dare making this one as blind baking and me is a big no. Last tiem I tried it, it completely failed and rice doens’t work quite well for blind baking. Where do you buy the beans for blind baking? Maybe I can find a way around the blind baking and make a different dough with the brownie filling.
I’ve used rice once as well, and you have to make sure you really fill the tin – be generous with the rice. Oh, and prick a few holes in the dough with a fork before covering it with the parchment paper helps too. I bought reuseable baking beans (they’re ceramic, I believe) from Cook & Co, but I think you can buy them at any cooking store with a decent baking section. 🙂