
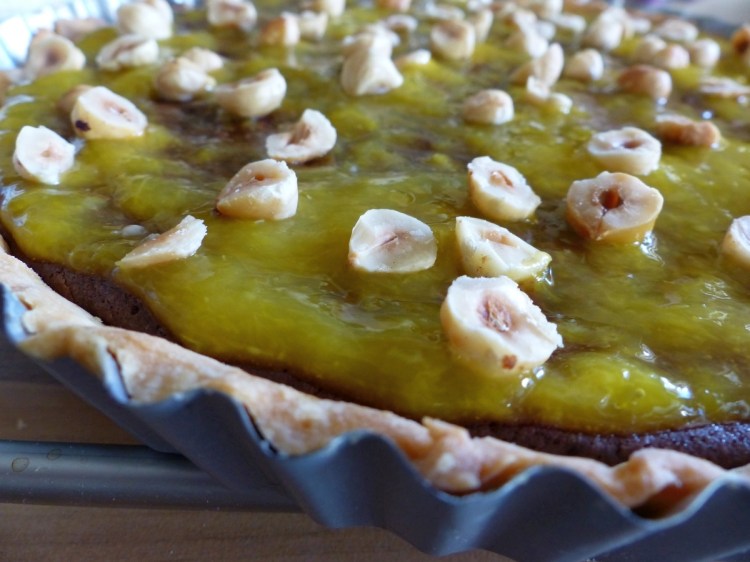
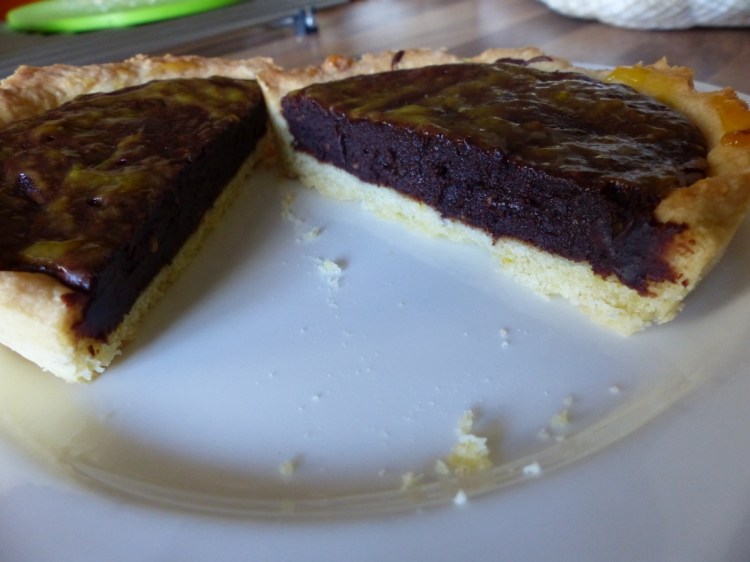
Back in 2015 I baked an absolutely delicious chocolate brownie and raspberry tart for my birthday. It was a huge success, and not that difficult – despite it having quite a few steps. This tart right here is a variation on that one – I used orange instead of raspberry and added some more hazelnuts to the equation.
It looks a tiny bit less appealing than the raspberry one because the orange coulis almost looks a little green (it isn’t; that’s just the brownie shining through), but it tastes just as delicious – or perhaps even a little better! I adore the combination of orange and chocolate, and the hazelnuts lift it up even more. I roasted these in the oven for a few minutes – that makes them taste even yummier. If you’re not a fan of nuts, however, you can easily leave them out.
I’m still having some trouble getting back into blogging and reading, which bums me out a little. I’m going to keep trying, though! I really love this blog and this community, and I definitely want to keep it all going.
Also, an exciting life update: I found a job! At a book store! It’s only a part time gig as an on call employee person thingy (and not yet enough to live off of) but it’s perfect for me. I had my first couple of days last week and it’s even more fun than I imagined it would be. Perhaps I’ll do a life update post soon to tell you all a bit more about what’s been going on with me post university. But first, let’s get to the recipe!

You’ll need…
For the pastry
- 260 g plain flour (and a little bit extra for dusting purposes)
- 125 g butter (cold, in cubes)
- 90 g white caster sugar
- 2 medium sized eggs, beaten
- a pinch of salt
- zest of half an orange
For the brownie filling
- 120 g unsalted butter (melted)
- 160 g sugar
- 3 medium-sized eggs
- 50 g plain flour
- a pinch of salt
- 200 g dark chocolate (at least 70% cocoa)
- 50 g finely chopped hazelnuts
For the orange coulis
- juice of 2 oranges
- 1 teaspoon cornstarch/cornflour
- 1 teaspoon sugar
- juice of ¼ of a lime
- optional: chopped hazelnuts for on top
Equipment
- a juicer (for the oranges)
- clingfilm
- parchment paper
- baking beans
- flan tin (24 cm or larger)
- rolling pin (although a wine bottle works just fine as well)
- saucepan
- and an oven, of course! The pastry needs to be baked at 180 °C (don’t forget to preheat your oven!)
So, let’s get baking!
The Pastry
1. Mix butter and flour together Put the butter and the flour in a large bowl, and rub them together with your (preferably cold) hands. Keep doing this until the mixture looks like breadcrumbs.
2. Add sugar, eggs and orange zest Add the sugar and the beaten eggs to the mixture, and gently stir it through. Also add the zest of half an orange at this point. Now you have to knead the mixture into a ball of dough (but don’t overwork it). The dough will be quite soft, but don’t worry, that’s fine! Wrap the ball of dough in clingfilm, and put it in the fridge. Cool it for one hour.
3. Roll out dough After you’ve let the dough chill for one hour, take it out of the fridge again. Lightly dust a (clean!) surface with flour, and roll out the dough until it’s about 3 mm thick. Make sure it has a round shape so it completely covers the tin.
4. Transfer dough to tin Now it’s time to transfer your dough to a greased and floured flan tin. Let’s hope it doesn’t stick to your work surface! To easily transfer the dough, carefully roll it around your (floured!) rolling pin, lift it, and then roll it out again over the tin. Be very careful while you do this, since the dough might stick to your surface, and you don’t want it to rip. Once you’ve succesfully rolled out the dough over the tin, press into the edges (gently), and trim off any excess dough around the edges. Prick with a fork into the bottom a few times.
5. Add flour and baking beans To make sure the baking paper doesn’t stick to your pastry while baking, divide some flour over the base of your tin (on top of the pastry). Then, line the tin with parchment paper (so, again, on top of the pastry), and fill it with baking beans. Put the whole thing in the fridge for another 15 minutes (at least).
6. Bake the pastry! After another 15 minutes of letting the pastry chill, put the tin in your preheated oven (180 °C) and bake it for 10 minutes. Then, take out the baking paper and baking beans and bake the pastry for another 5-7 minutes (until the bottom of the pastry just starts to brown slightly here and there).
The Brownie Filling (prepare this while the pastry is baking)
7. Melt the chocolate You can melt the chocolate in the microwave or by using the bain marie method on the stove. Either way, melt it.
8. Mix together butter and sugar Take a clean bowl and mix together the sugar and the melted butter with a whisk until it’s evenly combined. No need for it to be pale and creamy or anything.
9. Add the eggs Crack the three eggs into the mixture one by one and whisk them through the batter until they’re nicely incorporated.
10. Add flour and salt Add the flour and the pinch of salt to the mixture and, once again, whisk it through.
11. Add melted chocolate and chopped hazelnuts Only one thing left to add now, and the most important bit: the chocolate! And the chopped hazelnuts, of course (although these are optional). Whisk it all through the mixture until it’s all combined.
12. Pour brownie batter into pastry case Once your pastry is done baking, take it out of the oven, and pour in the brownie mixture (you might have a little too much – although there’s no such thing as too much brownie mixture). Remember that it will rise a teeny tiny bit, so don’t fill it all the way to the edge.
 13. Bake! Lower the oven temperature to 160 °C and put the tart back in. Bake it for 20 to 25 minutes, or until a skewer comes out relatively clean. The brownie mixture shouldn’t be dry, but it also shouldn’t be very wet anymore. If you think it’s done, take it out of the oven and let it cool.
The Orange Coulis (I recommend preparing this as the pastry dough is resting and putting it in the fridge until you need it)
14. Heat orange juice, sugar and cornflour Take a saucepan and heat the orange juice, sugar and cornflour on a low flame. Keep stirring the entire time until it thickens a little bit. This will take about 7 to 8 minutes.
15. Take off heat and add lime When the coulis has thickened a bit, take it off the heat and add the lime juice. If you can find it, you can also add a few drops of orange essence. I couldn’t find any, so I did it without the essence. Let the coulis cool down and put it in the fridge until you need it when the tart is done.
16. Pour coulis over tart (and add hazelnuts) Once your brownie tart has cooled down (and the coulis as well), pour the coulis over the tart. Also sprinkle the copped hazelnuts over the top of the tart. The hazelnuts are optional, but definitely add a little something more.
And there you have it! Your own chocolate brownie and orange tart with hazelnuts! Enjoy!

Mmmmmm jummie
😀