
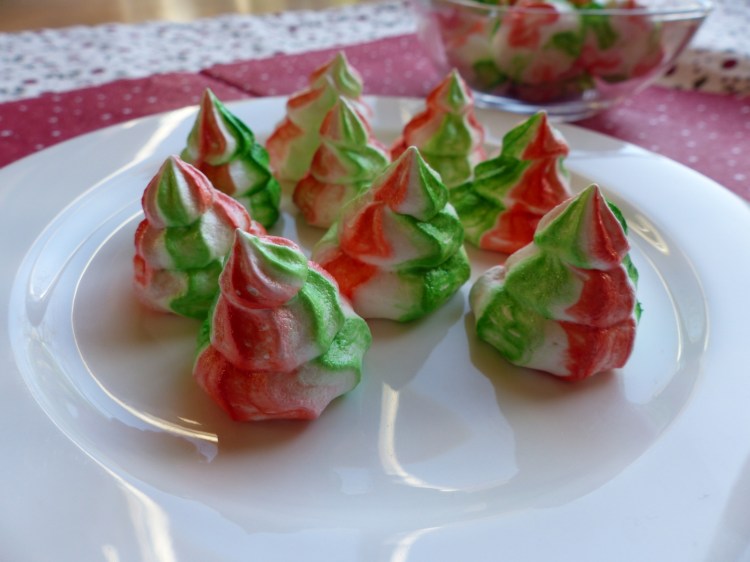
These Christmas Tree Meringues are the last recipe of the Festive Fortnight (cue “aaaaaw”s – there’ll still be two other posts, though) and they might be my favourite! I came across the concept of these meringues at a Dutch blog (Laura’s Bakery) and I immediately figured they’d be perfect for the Festive Fortnight. Ever since I got my free standing mixer, I’ve loved making meringues! They’re absolutely delicious treats and you can go all kinds of ways with the decoration.
The last time I made them I used food colouring gel to spruce them up for the first time, and I decided that I would use that same technique to paint these Christmas trees with some festive colours! I used red and green – the obvious Christmas colours – but you could also use all green if you want the meringues to resemble Christmas trees even more.
I based my meringue recipe on this recipe by CupcakeJemma and if you’re unsure how to make a good meringue, I’d definitely recommend watching her video. I tried to be as clear as I could in my instructions, but actually seeing what you’re supposed to be doing will beat any description I can give. Unfortunately, I didn’t take any pictures of the process, but Jemma describes everything super clearly.
These are so yummy, and they were gone before I knew it. My father in particular is a huge fan of meringues, but, then again, he’ll eat anything that has sugar as its main ingredient, it seems!
You’ll need… (for 50 meringues)
- 2 egg whites
- double the weight of the egg whites in sugar
- a pinch of salt
- ¼ teaspoon of vanilla aroma
- red food colouring gel
- green food colouring gel
- piping bag + star nozzle
- small paint brush
- baking tray lined with parchment paper
- a free standing mixer or good hand mixer
- and an oven, of course! These meringues need to be baked at 100 °C (don’t forget to preheat your oven!)
So, let’s get baking!
1. Make sure your equipment is grease free If you want your meringue to succeed, you always need to make sure your equipment is completely grease free before your start. Take a paper towel and moisten it with a bit of vinegar or lemon juice. Then, use the paper towel to wipe your bowls, whisk (attachment) and spatulas.
2. Whisk egg whites and salt Put the egg whites and salt together in a large bowl (or the bowl of your stand mixer) and whisk on a low speed. After a few minutes, big bubbles will start to appear in the egg whites, which is your cue to put the mixer on a higher speed. Keep mixing it on a medium to high speed until it’s gone stiff and white. If you can keep the bowl upside down without the egg whites falling out, you’re done. If the egg whites are still too soft, keep mixing until you’ve achieved the desired stiffness.
3. Add sugar Once you’ve made sure the egg whites are stiff enough, put it back on a high speed. Add the sugar one tablespoon at a time so you don’t knock the air out of the egg whites. When you’ve added all of the sugar, keep on mixing for another 8 minutes.
4. Add vanilla After the 8 minutes are up, your meringue should be smooth and glossy. At this point, Jemma says there shouldn’t be any grains of sugar left (rub some of the meringue between your fingers to check), but I’ve never reached that point myself (I’ve always had grains left) and my meringues have always turned out fine. Just add the vanilla aroma or extract and mix on high speed for another few minutes.
5. Prepare piping bag Add your star nozzle to your piping bag and then fold over the edges so it can lie propped open on its own. Take out your food colour gels, and squeeze a drop of each onto a plate (leave enough space between them – you don’t want them to mix!). Take your paint brush, dip it into red gel on your plate and then paint a neat line within your piping bag, from just before the tip all the way to the edge of your fold. Paint two red lines opposite each other, and then two green lines in the same manner, so you’ve got four lines evenly spaced out. I didn’t take a picture of this, so I’d really recommend taking a look at Jemma’s instruction here. That will make it much clearer!
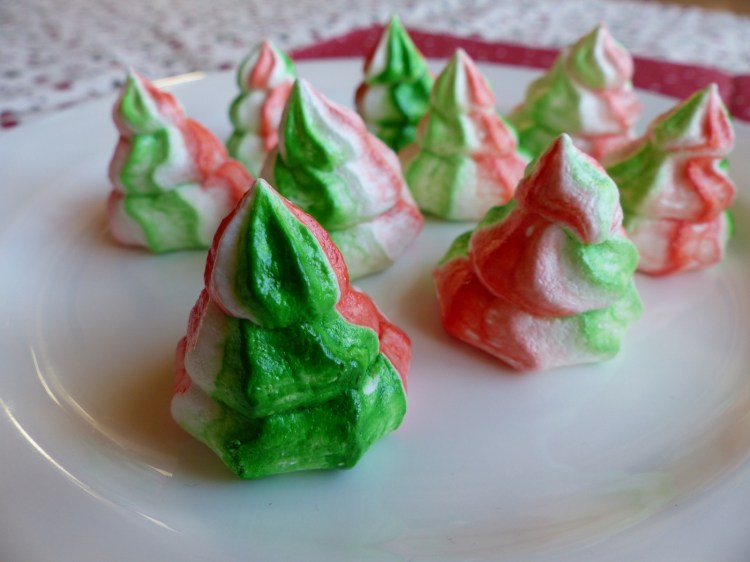
 6. Pipe meringues Once your piping bag is done, carefully spoon the meringue into it with a rubber spatula. You have to be careful about this, because you don’t want the meringue to collapse. Now it’s time to pipe the meringues onto your baking tray(s) lined with parchment paper. Here’s where the Christmas tree shape comes in! First, carefully pipe a star-shaped blob by holding your piping bag vertically above the tray and squeezing in one place. Then, add a smaller blob onto that base, and then an even smaller blob onto that one. You can see an example here.
7. Bake! When you’ve piped all of your Christmas trees, put the trays into your preheated oven and bake the meringues for 35 to 40 minutes. You can test whether they’re done by trying to pick them off the paper. If they come loose off the paper easily, they’re done!
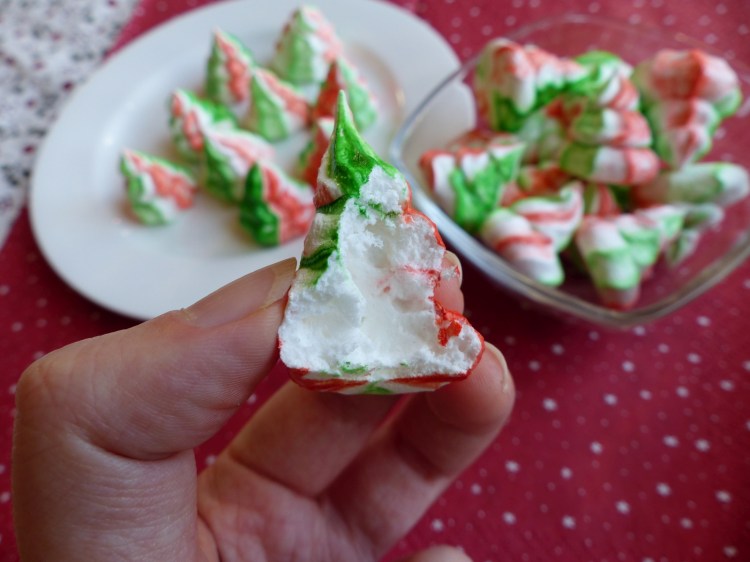
Leave the meringues to cool and that’s it! Your own cute Christmas Tree Meringues. Enjoy!


This is so cute! I’ve never actually eaten meringues, but they look yummy!
Thanks Lynn! Meringues taste like little sugary clouds – they’re delicious! 🙂
Yum! I love meringues too!
They’re so delicious!